M-96 in 6.5x55 to a 358 Win

The #1 community for Gun Owners of the Gulf Coast States

Member Benefits:

  • Fewer Ads!
  • Discuss all aspects of firearm ownership
  • Discuss anti-gun legislation
  • Buy, sell, and trade in the classified section
  • Chat with Local gun shops, ranges, trainers & other businesses
  • Discover free outdoor shooting areas
  • View up to date on firearm-related events
  • Share photos & video with other members
  • ...and so much more!
  • Recondo 101

    Expert
    Joined
    Jul 21, 2024
    Messages
    120
    Points
    43
    Location
    NW FL
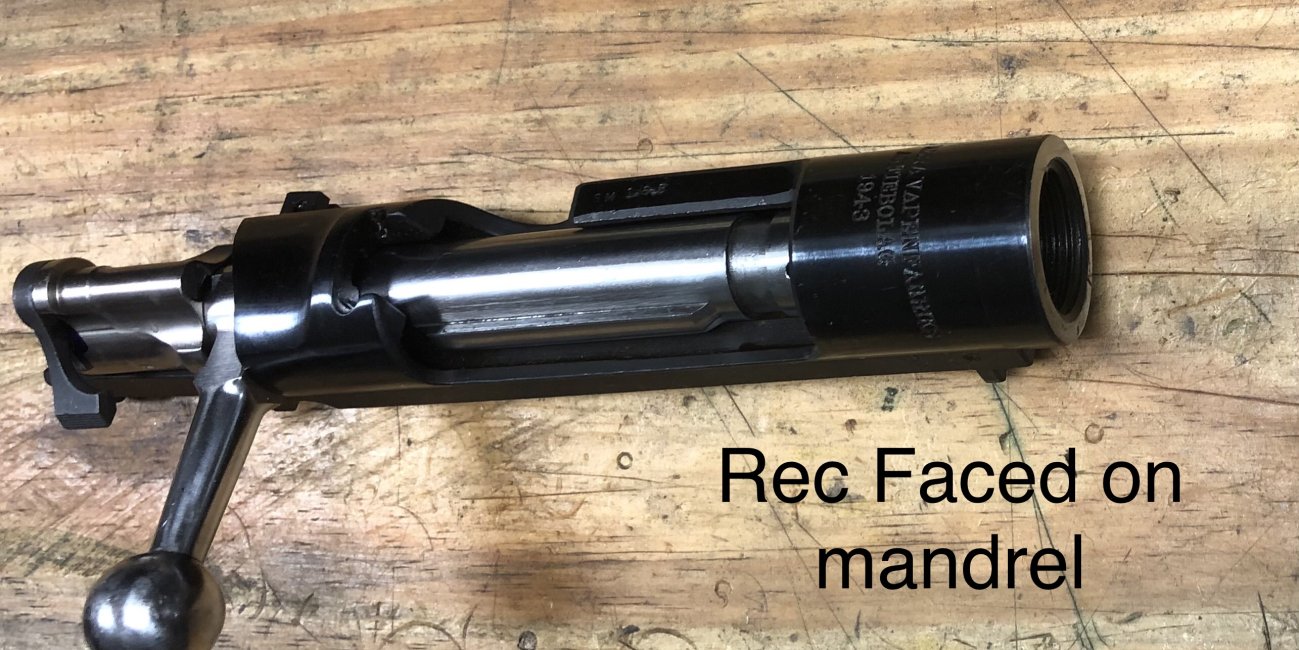
    Had a brand new arsenal Husky 1943 M-96 action, never had a barrel mounted. So kept thinking about what to do with it. I have several 35 cal rifles I have built, but not a single 358 Win rifle....so why not build one.

    Checked the data, not a super easy conversion, but can be done if you pay attention to feeding, extractor hold, OAL, etc. Max loads as listed are only 2k PSI different. I am not interested in max loads. But the M-96s were proofed to 70k+ psi each, before sale to the public, and the Husky is reported to be the best of the 96s. I really wanted a cast bullet 35 rifle, so.

    I figured maybe about 40 alterations, am now at 48 so close enough with the Carekote, glass bedding and cross bolt with English walnut cap. Absolutely not very cost effective for a paid project. Have done a few 96s so this was only a why not project for myself. The 96 is a 3/4 length action, not a short or a long action, is in-between.

    IMG_0526.jpeg

    IMG_0521.jpeg

    IMG_0520.jpeg

    IMG_0545.jpeg

    IMG_0572.jpeg

    IMG_0659.jpeg

    IMG_0731.jpeg
     

    Recondo 101

    Expert
    Joined
    Jul 21, 2024
    Messages
    120
    Points
    43
    Location
    NW FL
    A few more pictures, I normally do not take pictures, just go through the process, step by step, then take a picture at the end. Decided on this project to take pictures as I went through each modification. I wrote the mods down and got to 54.
    This is the cross bolt setup, cap dowel bit in mill, cross bolt drilled and installed, cross bolt jig, tools, and lamp for black, dowel cap mounted over the bolt head before cut off.
    Dowel Cutter in mill
    IMG_0665.jpeg

    Cross bolt Inserted and dowel cap bits
    IMG_0664.jpeg

    Cross Bolt Jig w drill bits, barrel channel rasp, lamp black, file-rasps and Dremmel for touch up fit of jig
    IMG_0661.jpeg

    Cross bolt cap dowel glued in place for final surfacing
    IMG_0669.jpeg


    Note the inside of the wood inletting is rough on purpose to provide a holding surface for the Acraglass Gel bedding. It will be 1/8" drilled and fine saw cuts made at opposite angles to provide a strong holding surface.
     

    Recondo 101

    Expert
    Joined
    Jul 21, 2024
    Messages
    120
    Points
    43
    Location
    NW FL
    This is the bolt mods, bolt handle forged and shaped, shroud modified, cocking thumb piece removed, safety cut, safety installed.

    Faced and threads trued on mandrel.
    IMG_0507.jpeg

    De cocker removal, firing pin length reduction, fit and polish
    IMG_0500.jpeg

    De cocker, firing pin polish with sporter safety installed
    IMG_0506.jpeg


    Timney trigger installed w/ safety adjusted for proper function
    IMG_0519.jpeg


    Stripper clip hump removed
    IMG_0522.jpeg


    Tang cut layout
    IMG_0508.jpeg


    Lug lapping tool w new brass dummy to set headspace and feed
    IMG_0502.jpeg


    Forged and formed bolt handle w scope base for scope clearance
    IMG_0551.jpeg
     

    Attachments

    • IMG_0503.jpeg
      IMG_0503.jpeg
      835.5 KB · Views: 1
    • IMG_0502.jpeg
      IMG_0502.jpeg
      834.9 KB · Views: 0

    Recondo 101

    Expert
    Joined
    Jul 21, 2024
    Messages
    120
    Points
    43
    Location
    NW FL
    A couple of tools

    This is the Forster drill / Tap fixture for the milling machine.

    IMG_0532.jpeg


    This is a Machine Turning or Jewling fixture

    IMG_0568.jpeg


    The bolt body and handle flat jeweled
    IMG_0576.jpeg


    The jewling fixture is not to common, the geared head moves 1/2 row per click, the end crank movs one half row per click to create the over lap. Both adjustments are spring loaded and you move in one direction as you jewel or cut the surface
     

    Recondo 101

    Expert
    Joined
    Jul 21, 2024
    Messages
    120
    Points
    43
    Location
    NW FL
    Went down to check the final coat on the stock, to see if it is setting up in all of this humidity. It is doing OK and I got a decent picture of the stock by changing the angle of interior over head lights. And a picture of the finished Carakote Granite Black coated metal.

    IMG_0815.jpeg


    IMG_0817.jpeg
     
    Top Bottom